Works on Cotton or Linen.
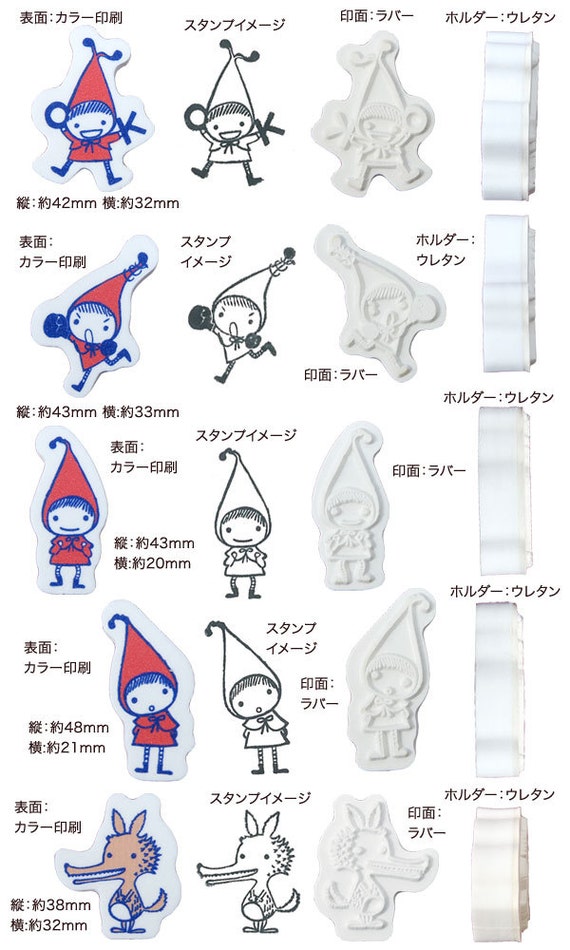
I thought to use these stamps:
https://www.etsy.com/listing/386581744/2016-shinzi-katoh-rubber-stamp-set?utm_campaign=shopping_us_littlehappythings1_sfc_osa&utm_medium=cpc&utm_source=google&utm_custom1=0&utm_content=5695272&gclid=CjwKEAjwja_JBRD8idHpxaz0t3wSJAB4rXW5-49YnWACCiK-oquIHL6UgcNQAOn2q4wVaDix8pOUMRoCo-Xw_wcB
Ink to use:
http://www.dickblick.com/products/jacquard-versatex-screen-printing-inks/
https://www.amazon.com/Versatex-Screenprinting-Black-Fabric-Jacquard/dp/B0007YLF6C/ref=sr_1_1?ie=UTF8&qid=1496099590&sr=8-1&keywords=versatex+screen+printing+ink
Palette pad:
http://www.dickblick.com/products/blick-studio-disposable-palette-pads/
https://www.amazon.com/Strathmore-41-Pound-40-Sheet-Stratchmore-Palette/dp/B00CPD0O1U/ref=sr_1_3?ie=UTF8&qid=1496099628&sr=8-3&keywords=disposable+palette+pad
Brayer:
http://www.dickblick.com/products/speedball-pop-in-brayer-kit/
https://www.amazon.com/Speedball-Rubber-Brayer-Plastic-Inches/dp/B0007ZJ8T2/ref=sr_1_3?ie=UTF8&qid=1496099736&sr=8-3&keywords=speedball+pop+in+brayer
How to:
http://www.threadsmagazine.com/item/4779/fabric-printing-with-a-brayer/page/all
Fabric Printing with a Brayer

Brayers have nearly infinite possibilities for applying paint to fabric. Combined with ordinary objects, a brayer can create an endless variety of repeating and nonrepeating patterns on all kinds of fabric, including as much or as little color variation as you choose.
by Lois Ericson and Dawn McIntyre
from Threads #96, pp. 59-63
Creating your own printed or painted fabrics is a delicious prospect, but it can also be a daunting one for the beginner worried about lack of experience with artists’ tools. Well, if you’ve ever painted a wall with a roller, you’re already an old hand with a brayer, a small, rubber-faced version of the basic paint roller, as shown above. A surface-design tool with nearly infinite possibilities for applying paint to fabric, the brayer requires no skill or training beyond a good eye and a taste for adventure. Combined with ordinary objects, it can create an endless variety of repeating and nonrepeating patterns on all kinds of fabric, including as much or as little color variation as you choose. In this article, we’ll provide an overview of brayer types and paint options, then demonstrate ways to create interesting textures and patterns by rolling the brayer over manipulated fabrics or fabrics layered over textured surfaces.
 |
| Rolling out a pattern from a textured surface underneath the fabric is one of many ways to use a brayer. Photo: Sloan Howard. |
Brayer-printing tools
 |
Textured brayers can be bought or made. The authors’ collection includes:
1. a rolling pin wrapped with rubber strips, which rolls out the bamboo-like pattern shown at bottom left in the four-photo group below;
2. a Rollagraph rolling rubber-stamp, plus a substitute wheel in a different pattern;
3. a hard-rubber brayer wrapped diagonally with a rubber strip;
4. two foam paint rollers, one of which has been cut to make striped patterns; 5. a rubber-band-wrapped brayer (like that in use in the photo at top left in the group below), plus a smaller, rubber-wrapped “bamboo-maker”;
6. and a commercially produced, prepatterned roller, with an alternate, snap-in roller. |
Brayer basics
Designed to spread thin and then transfer uniform layers of ink or paint onto printing surfaces, such as linoleum or wood blocks, brayers come in many sizes and are made from a variety of substances. For fabric embellishment, a plain, 2-in. to 4-in.-wide, soft-rubber brayer, as shown in the first photo in this article, works well and is available inexpensively from most art-supply stores (the rubber type is usually well labeled; Speedball makes a typical example). Avoid hard-rubber and larger brayers, both of which are slightly more difficult to use.
By itself, a plain brayer will lay down a smooth strip of paint or thickened dye, just as a paint roller will. In fact, small foam paint rollers can also be used on fabric; they consume a lot of paint but can quickly cover large areas. Just manipulating a plain brayer with jerking, rocking, and rolling motions as you apply paint to the cloth can create fascinating effects.
Brayer-printing strategies
 |
| Texture the brayer for automatically repeating patterns, as produced by this rubber-band-wrapped brayer. Its removable roller simplifies wrapping (left). Texture the fabric instead of the brayer. Pleating, gathering, wrinkling, and shirring are good texturizing methods. After rolling, the fabric is uncompressed and ironed flat (right). |
 |
 |
| Use just the edge of the brayer. To add leaf markings to the bamboo pattern made with brayer No. 1 in the bottom photo on the facing page, a small brayer is held at an angle (left). Roll over a stencil. Acetate makes an easy-to-cut stencil. Loops of thread caught under the stencil add randomly shaped resist patterns (right). |
Textured brayers produce lively patterns
Pretextured rollers for creating faux wall finishes are also available from more complete craft and art sources, along with textured brayers in several different patterns for paper crafts. We prefer brayers with simple textural surfaces and usually just texture our own, as shown at bottom right.
It’s easy to add temporary texture to plain rubber brayers. Try wrapping rubber bands around the roller, varying the spacing to create regular or irregular patterns. String, which will create repeating linear squiggles, sticks easily to a paint-covered brayer. To keep the string on the roller, use only a forward motion when applying additional paint to the brayer. Or scrape paint off the brayer in random or regular patterns using a razor blade or popsicle stick, or a notched adhesive spreader from the hardware store.
Once you’re on a roll (sorry, couldn’t resist!), you may want to investigate Rollagraph and other stamp rollers, like those at right. Though more like rubber stamps than brayers, these tools roll out color and can thus be used just as brayers can. Many of these and more supplies can be found at fabric, craft, paint, hardware, and art-supply stores.
|
 |
|
Basic equipment for brayer painting: A soft-rubber brayer (available in many widths from most art-supply stores), fabric paint as described below, a glass palette for rolling out the paint and loading the brayer (1/4-in. plate glass, about 12 in. by 6 in., with polished edges, and available from any glass shop is ideal), and rubber gloves for easy cleanup. |
“Inking” a brayer
Because of the brayer’s primary use as a printing tool, coating it with paint, dye, or ink is called inking. You’ll get best results with a thin, even coat of paint on the brayer. The best surface for inking a brayer is a smooth, flat, hard palette that’s about 12 in. by 6 in. and easy to wash, such as a piece of 1/4-in. plate glass (right), Plexiglas, tempered Masonite, or any hard plastic.
Place a 1/2-teaspoon-size dollop of paint on the palette and roll the brayer through it vertically and horizontally until there is a thin, even coat of paint on the glass and roller. For best results, roll the brayer in one direction only; rolling forward rolls ink on, and rolling backward rolls ink off.
Clean your brayers and tools with a soft cloth, detergent, and warm water. Textured brayers may need to be scrubbed gently with an old toothbrush to get paint out of recessed areas. To avoid ridges and dents in the rubber, store your brayers by hanging them so the rubber doesn’t touch anything.
Fabric paints work best
Numerous paints, dyes, and inks are available that will work for printing on fabric with a brayer. However, not all are the proper consistency—like that of mayonnaise—for easy brayer printing right out of the jar. For simplicity’s sake, in this article we’ll describe only the use of widely available fabric paints, which are usually the perfect consistency.
Paint bonds to the surface of cloth fibers, leaves them feeling stiff when dry, and requires heat setting in order to be wash-fast, which usually helps soften the painted fabric (follow the manufacturer directions for heat setting). The stiffness is not as noticeable on heavy fabrics but might be an issue on soft fabrics that need to drape. Our favorite brand is Versatex, which seems to be the softest after heat setting. This paint is made for printing, so it’s just right for brayer work as it comes from the jar.
Even inexpensive acrylic or craft paints have the proper consistency and will work, but these products tend to stiffen fabric a lot when dry. “Fabric medium” can be added to acrylic paints to create a better bond with cloth fibers, soften the effects, and offer laundering stability.
Many metallic fabric paints are available as well, but because of the mica particles in these paints, all leave a stiff “hand.” Our favorite brand is Lumiere.
Dyes and other colorants can be used if thickened with sodium alginate, available where fabric-dyeing supplies are sold. Sprinkle approximately 1/2 teaspoon sodium alginate evenly over the surface of 1/2 cup of liquid dye; let set about 30 minutes, stirring every 10 minutes until smooth; add more paint or more sodium alginate until you have a mayonnaise consistency.
Texturing techniques
In the photos below, you’ll see many examples of brayer techniques that create interesting effects, either by manipulating the fabric prior to rolling to create a textured surface, or by transferring a texture placed underneath the fabric. These ideas are, of course, just the beginning; the list of possibilities is truly endless, and we hope our suggestions will help you see texturing tools everywhere: in your backyard, the woods, the beach, around the house and garage, at hardware and second-hand stores, flea markets, dollar and discount stores, even your local frame store. Look for any objects that might create interesting textures, patterns, or shapes when rolled over with a paint-filled brayer. We hope that you’ll be inspired to try out many variations of the ideas here, and that you’ll share your discoveries with us and other Threads readers.
Roll a brayer over textured surfaces
 |
| Triangles of corrugated cardboard arranged in alternating directions and glued to cardboard under various colored poplins. |
|
 |
| Adhesive rubber strips arranged in a zigzag pattern on a piece of cardboard under a black cotton jacquard. |
|
 |
| A small wooden shelf under hand-dyed, cotton jacquard; the small red squares were rolled through a tiny acetate stencil. |
|
 |
| A leaf, a length of picture-frame molding, and a sheet of perforated foil under chiffon. |
|
 |
| Cut-out leather scraps arranged and glued to cardboard, then placed under a jacquard-stripe chiffon scarf. |
|
 |
| A length of picture-frame molding under a black velvet pillow top. |
ANOTHER HOW TO:
DIY PRINTED FABRIC WITH RUBBER STAMPS
Materials
Fabric (we used linen – but cotton fabric would also work)
Camellia Pattern Stamp
Daisy Pattern Stamp
Small Leaves Pattern Stamp
Ink
Brayer
Disposable spoon (or one you don’t plan to eat with again)
Disposable Palette
Scrap Paper
Iron & Scrap of Cloth
DIY Printed Fabric with Rubber Stamps / Antiquaria for Oh So Beautiful Paper
Step 1. Spoon some of ink onto the disposable palette. With the back of the spoon, smear the ink in a rectangle, down the center. Using the brayer, roll the ink onto the palette until you get a thin film of ink in the center. Now you’re ready to start printing!
Step 2. First test your overall pattern on a small piece of fabric. Lay the fabric over a scrap piece of paper to protect the table from ink stains. Lightly use the brayer to roll ink onto your stamp. Start with the largest (most dominant) stamp, before using smaller stamps to fill in the pattern. Place the stamp down, and stamp it as if you were printing on a sheet of paper using moderate and even pressure. Lift the stamp and re-apply ink.
Step 3. Begin stamping on your fabric. Start with the largest stamp (we used our Camellia pattern stamp) until you’ve covered your entire piece of fabric. Use the next smallest stamp (we used our Daisy pattern stamp) to start filling in the negative spaces. The last stamp was our Small Leaves Pattern stamp. Because it’s small, it make a wonderful filler and allows you to really balance the overall design. We found that dipping into the thin layer of ink works best for the small stamps vs. using the brayer.
Step 4. Heat set the ink once you’ve finished printing all of your fabric according to the manufacturers instructions. In our case, we used a dry iron and a scrap piece of fabric.
This technique excites us so much and we can’t help thinking of all of the possible uses for our very own customized fabric! Imagine stamping your monogram onto linen napkins for your wedding, making tote bags for your bridesmaids, incorporating the print into your handmade wardrobe or even making custom print fabric envelopes for your invitation!